


Next: 12. Final Assembly
Up: QuickFlick-II Build manual
Previous: 10. Peg Installation
Subsections
11.1 Rear fuselage fairing
Abrupt terminations in the smooth flowing of an object causes a lot
of drag. Drag will slow down and consume the energy in your airframe
meaning you ultimately will get shorter flights. Streamlining the
fuselage will help reduce the drag profile. The gains obtained by
streamlining will not be profound but they will all help ( a few more
meters of height on the launch or a better L/D ratio ).
By default the QFII has a rather coarse fuselage ending, a simple
firewall, we can improve on this by adding some light balsa cheeks
and sanding it down to a smoother profile.
- Cut out a single block of 35x30x12mm balsa
- Butt glue the block to the rear of the fuselage (F5) above the control
wire guide tubes
- Avoid getting glue on the guide tubes
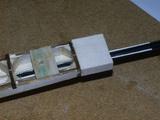
- Cut out two blocks of 12x20x12mm balsa
- Glue the blocks on either side of the boom, adhered to the previously
installed block and F5
- Avoid getting glue on the guide tubes
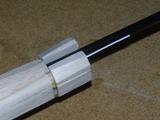
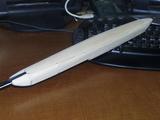
- Shape the blocks to a more streamline profile, terminating the balsa
as close to the boom as possible
11.2 Fiber glassing (ADVANCED)
If you wish to add some additional durability to the QFII, you can
apply fiberglass to the fuselage allowing it to handle landings on
rougher ground (for those moments when a hand catch just doesn't seem
to work). An additional advantage of using FG on the fuselage is that
it adds strength to the whole assembly which can allow you to shape
the fuselage to a more streamline shape.
The exact method for fiber glassing the fuselage will vary depending
on your experience and type of glass that you're working with.
We will be using 2oz straight weave cloth and bond it with clear water
based polyurethane paint (Cabots, Minwax etc). The nice thing about
using PU paint is that it's low cost compared to resin or epoxy and
it isn't as toxic, additionally it doesn't require mixing other than
the usual stirring before use hence there's no excess wastage.
- Cut a piece of glass cloth with about 100~120mm wide
and sufficiently long to suit your fuselage (if you have added the
rear fairing it'll need to be a bit longer)
- Before applying the glass cloth, coat the fuselage with a layer of
the varnish, this serves two purposes
- It seals the wood and prevents it from absorbing too much additional
varnish when the glass is applied
- It provides a slightly tacky base on which to lay the cloth
- Lay the cloth over the fuselage and position it, don't panic about
rushing against the clock, the varnish will take at least 30 minutes
to touch dry typically
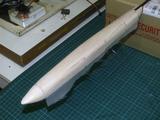
- Apply a brushing of the varnish to the cloth
- Make sure you apply sufficient varnish that it's fully soaked into
the weave of the cloth
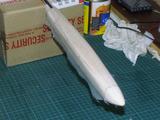
- After the first coat has dried partially (approximately 3 hours for
a lot of varnishes) cut off the excess cloth using a sharp No.11 blade
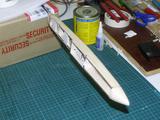
- You will need to apply about three (3) coats of varnish before the
weave of the cloth seals up.
To make the glassing of the canopy easier, we do it separately to
the fuselage
- Tack glue the canopy to a length of wood
- Clamp the extension to the bench, leaving the canopy to stand clear
of obstructions
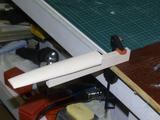
- As with the fuselage, seal the balsa with a quick coat of varnish
- Apply glass cloth
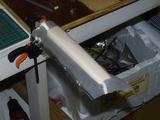
- Apply first coat to glass
- Trim glass back when suitably dry
- Apply additional two layers of varnish


Next: 12. Final Assembly
Up: QuickFlick-II Build manual
Previous: 10. Peg Installation
Paul Daniels
2005-09-15


