

Next: 7. Control Rod and
Up: QuickFlick-II Build manual
Previous: 5. Wing
Subsections
The exact dimensions of the nose block and canopy, as well as their
construction is primarily up to the builder, for this manual we'll
use soft balsa.
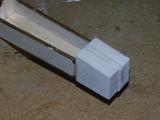
- Make up a nose block either from a solid block of balsa or a lamination
of thinner sheets.
- The nose block should be at least 35 x 35 x 35mm, some people prefer
to go to 40mm long for that extra sleek look.
- Glue the block flush to the bottom of the fuselage.
- The excess on the top is deliberate to allow the smooth follow on
from the canopy.

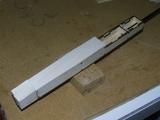
- Cut an approximate block of at least 6mm balsa for the canopy such
that it overlaps the sides by a couple of mm, this gives us clearance
for when we're shaping the final block (12mm can be used if you want
an extra round canopy).

If you're planning on adding the rear fuselage fairing / profiling,
it is suggested that you do so at this point so that you can form
an even smoothing
(ADVANCED) If you're planning on fiber glassing the fuselage
then you can afford to plane and sand back further because the fiberglass
will add strength that would have otherwise been provided by the balsa
structure.
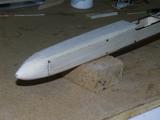
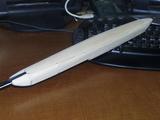
- Using a balsa plane, coarsely shape the canopy and the nose to the
desired result

- Using a sanding block bring the finish to a finer standard

- Cut the canopy block at a downward 45 degree angle (from back to front)
approximately 20mm from the front. The reason for the downward angled
cut is to provide a natural locking facility preventing the canopy
from lifting up and flying away
- Glue the 20mm portion to the fuselage
- From a scrap of 3.2mm balsa, cut a small block about 5mm wide with
bevelled corners that will fit just in front of F3
- Place this block into position against F3 using some BluTack,
Prestick or other plasticine like
substance with the surface slightly raised above the fuselage.
- Add some medium CA to the top of the block
- Insert the large portion of the canopy into place, sliding it under
the previously glued 20mm portion and then lowered down onto the shaped
block
- This will position the block accurately onto the canopy
- Using CA means that you can pull the canopy and block assembly away
within a few seconds
- Remove the plasticine substance
- Test fit the canopy again


Next: 7. Control Rod and
Up: QuickFlick-II Build manual
Previous: 5. Wing
Paul Daniels
2005-09-15


